Transplanting 101: From Pregrown Seedlings to Your Hydroponic System
Introduction
Starting plants from seed is one of the most rewarding steps in hydroponics. It gives you full control over timing, variety, and health—plus, it’s safer. You know exactly what your plants have been exposed to, and you can dial in your environment from day one. But let’s be real: life happens. Whether you're short on time, starting late in the season, or just need a quick boost to fill a gap in your grow cycle, pregrown seedlings from local farms, corner markets, or packaged systems like Lettuce Grow can be a helpful shortcut.
That said, the best way to avoid relying on outside sources is to embrace succession planting. By keeping a steady rotation of seedlings in your pipeline, you’ll always have a healthy plant ready to move into your main system—no last-minute scrambles, no compromises.
This guide walks you through how to safely transplant pregrown seedlings into your hydroponic setup, whether they’re home-started or store-bought. We’ll cover gentle handling, root prep, quarantine protocols, and tips to ensure a smooth transition with minimal stress—for both you and your plants.
🌱 Pre-quarantine prep
Before introducing any new plant into your Gardyn system, pause and set the stage. Plants grown in soil, coir, or peat can carry pests, pathogens, or subtle stress that isn’t obvious yet. A quick, gentle prep protects your entire ecosystem and helps the new seedling adapt to hydro.
💧 Quick water prep with PHLO
When rinsing roots or misting during intake, use clean water conditioned with PHLO. It supports a friendlier starting environment for roots adjusting from soil to hydro—without adding nutrients during quarantine.
Shop PHLOInspect the plant thoroughly
Look under leaves, along stems, and near the base for aphids (tiny green/black), spider mites (fine webbing), and fungus gnats (small flyers near media). Check for mold or mildew—white, gray, or fuzzy—and note yellowing, browning, or spotting. If you spot something, don’t panic—that’s why we prep and quarantine.
Remove the initial grow media
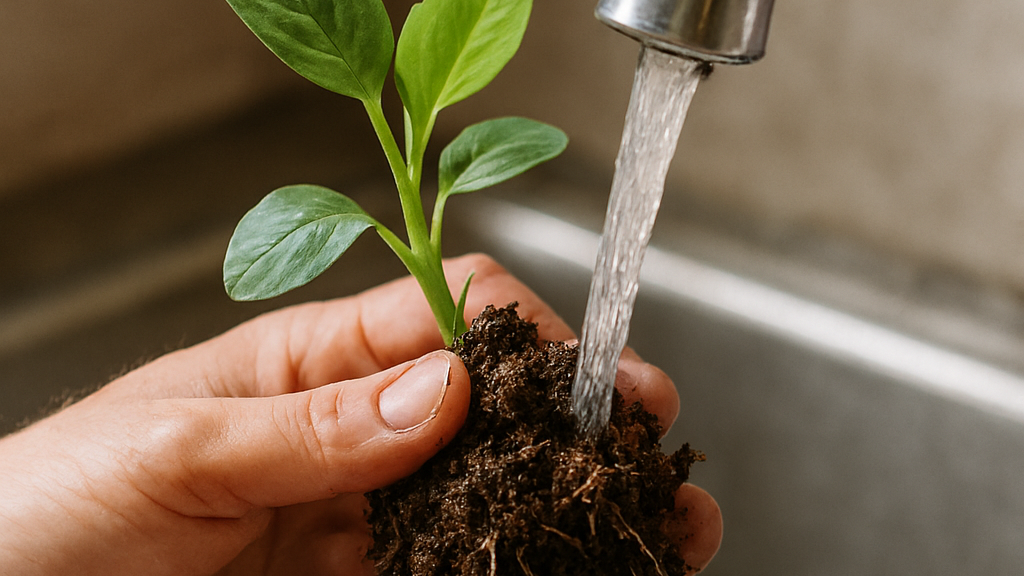
Hydroponic systems grow in water—not soil—so fully remove previous media before transplanting. Loosen the root ball with your fingers to shake off excess. Rinse roots under lukewarm water using a gentle stream—avoid hot or cold shocks. For stubborn bits of soil or coir, use a soft toothbrush or clean paintbrush to sweep them away. Be patient: preserve as much root integrity as possible.
Trim excess foliage
Remove damaged, yellowing, or diseased leaves so the plant redirects energy to recovery. Use clean scissors or snips, cutting close to the leaf stem base without tugging. Observe patterns (lower yellowing, tip burn, spots) for clues about prior stress and what to monitor next.
🧼 Quarantine setup (7–10 days)
Quarantine gives the plant time to recover and show you how it’s doing—without risking the rest of your system. Use this window to observe, gently rehydrate, and confirm it’s pest‑free and stable before it joins your Gardyn.
Follow these steps during the quarantine period
- 🪴 Place the plant in a separate container—a seedling tray or shallow bin with drainage—away from your Gardyn in a well-lit area with similar temperature/humidity. This reduces stress from environmental shifts and avoids cross‑contamination with your main system.
- 💧 Mist gently as needed to maintain humidity and refresh leaves. Use plain water or PHLO‑treated water; optionally, a light hypochlorous acid (HOCl) solution at 50–100 ppm if surface pathogens are a concern. Avoid oils or nutrient sprays during quarantine. Gentle hydration supports recovery without pushing growth or masking early pest/disease signs.
- 🧪 Use clean water only (no nutrients) for the quarantine period. A nutrient‑free flush helps clear residual soil inputs and makes pests or issues easier to spot early.
- 🔍 Observe daily for pests, mold, or transplant shock (curling, yellowing, drooping). Check leaf undersides and media surface; place sticky traps nearby to monitor flyers. Daily, low‑effort checks catch problems before they escalate.
- 🧼 Practice clean handling. Wash hands or gloves before/after touching plants; label trays; keep tools (sprayers, tweezers, scissors) dedicated per plant. Separate tools and labels minimize accidental spread and confusion during observation.
- 🧴 Optional pre‑quarantine dip if pests are suspected: Use an insecticidal soap or a neem‑based product diluted per label before the quarantine period begins. Rinse gently afterward. Treat first, then observe in a clean environment to ensure the issue is resolved.
- ⏳ Give it time: Most plants stabilize in 7–10 days. Look for upright posture, new healthy growth, and zero pest activity before moving on. Clear readiness criteria prevent premature transplanting and setbacks.
⚠️ Common quarantine mistakes
- Skipping the media rinse: Soil bits linger, harbor pests, and clog hydro.
- Feeding too soon: Nutrients during recovery can mask issues and stress roots.
- Over‑misting under domes: Traps moisture and encourages mildew.
🌿 Transplanting into Gardyn
Once your plant is clean, stable, and pest‑free, it’s ready for the move. The goal is firm support, good root contact with moisture, and calm conditions for the first week.
💡 Why start with VBX?
After quarantine, roots benefit from a gentle, balanced feed. VBX is formulated for early uptake—enough to fuel growth without overwhelming tender tissues transitioning to hydro.
Shop VBXFit the seedling into a cube or pod
Use an empty Rockwool cube or a seedless yCube and slice it in half. Nest the cleaned roots inside and close it gently. If using a yCube, place the rockwool into the cube; if using a hydropod, secure roots into the cube with a small rubber band to ensure contact without constriction.
🌱 Positioning and contact
Seat the cube so the base just touches the moisture zone—wet but not submerged. Ensure roots have air access and aren’t crammed; slight splaying is fine.
✂️ Optional root tidy
If roots are extremely long or tangled, lightly trim frayed ends with sanitized scissors to encourage fresh branching. Keep any trimming minimal.
💧 First feeding after quarantine
Once the plant stands upright and shows healthy new growth, introduce a light feeding of Veg+Bloom or VBX at reduced strength for the first 3–5 days, then step up as new growth continues.
Monitor closely for 1 week and watch for transplant shock or signs of stress (droop, curl, pale new growth). Adjust light intensity and airflow gently if needed.
🧼 How to safely remove coir/peat media from Lettuce Grow seedlings
-
Prep your workspace — Use a shallow tray or bowl filled with lukewarm water. Have clean tweezers, a soft brush, and paper towels ready.
Warm water softens media and reduces root breakage while you work.
Optional: Add a small amount of 3% hydrogen peroxide to the water for mild sterilization. -
Hydrate the plug — Submerge the entire plug for 5–10 minutes to soften coir/peat.
This loosens fibers so they slide off without tearing fine roots. -
Gently tease apart — Hold the seedling by its base (not the stem) and massage the plug. Use tweezers/fingers to lift away chunks from the outside in. If roots are tightly bound, leave a small amount of media near the root ball rather than risk tearing.
A little media left is safer than ripping critical feeder roots. -
Rinse and inspect — Dip the root system in fresh water to remove remaining particles; check for pests, rot, or damage. Trim mushy or broken roots with sanitized scissors.
Clean, intact roots adapt faster to hydro and reduce pathogen risk.
Before you start checklist
- Clean tools ready: Scissors/snips, tweezers, soft brush, trays.
- Water prepped: Lukewarm, optionally conditioned with PHLO.
- Quarantine space: Bright, gentle airflow, separate tools/labels.
- Rockwool/yCubes: Pre‑cut and ready to nest roots.
- Starter nutrients on deck: Veg+Bloom or VBX for post‑quarantine feeding.

Water conditioning for gentle transitions

Balanced early‑stage feeding

Reliable base nutrients for growth


